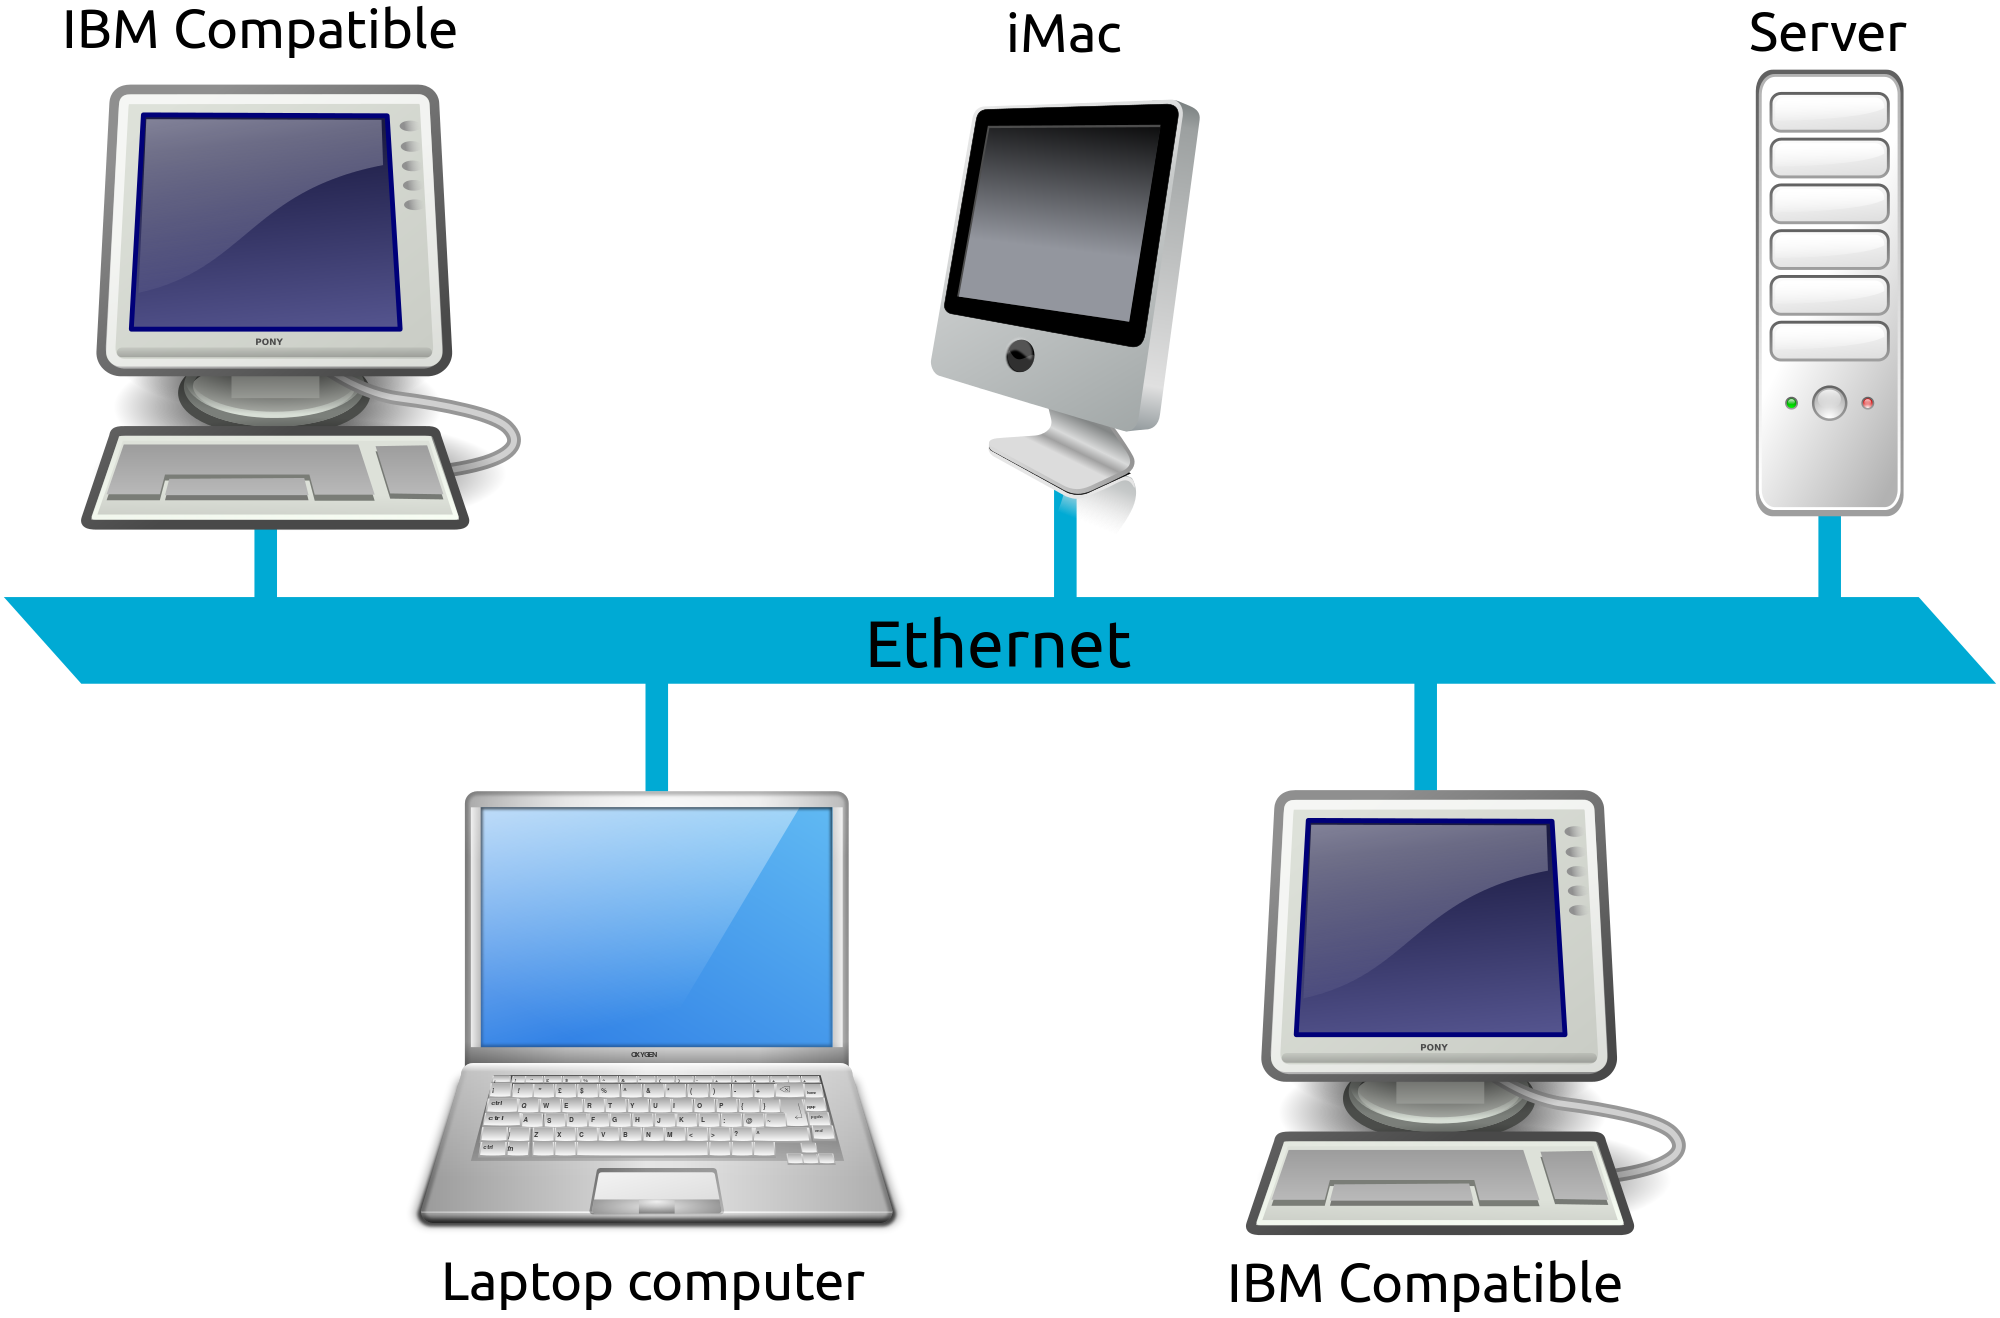
Setting up a new D-Link router to integrate seamlessly into your existing network is a straightforward process. In this comprehensive tutorial, we’ll walk you through each step, from accessing the device to configuring it with your ISP settings. Whether you’re setting up a home network or optimizing your office connectivity, this guide will ensure a smooth transition to your new router.
Step 1: Accessing the Device
- Locate Default Settings: Turn your attention to the back of the D-Link router and take note of the default settings provided. This includes the default device IP address, username, and password, which you’ll need to access the router’s configuration interface later on.
Step 2: Preparation
- Gather ISP Settings: If your internet connection type is PPPoE (Point-to-Point Protocol over Ethernet), gather the necessary ISP settings provided by your service provider. These settings typically include your PPPoE username and password.
Step 3: Router Configuration
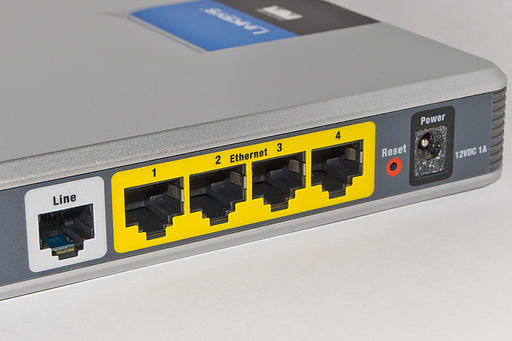
- Connect to the Router: Using an Ethernet cable, connect your computer to one of the LAN ports on the D-Link router.
- Access Router Interface: Open a web browser on your computer and enter the default IP address of the router (as noted earlier) into the address bar. Press Enter to proceed.
- Login: Enter the default username and password for the router when prompted. These details are typically found on the back of the router. Most router had a default admin account.
- Navigate to Setup Wizard: Once logged in, locate the Setup Wizard option within the router’s interface. This wizard will guide you through the initial configuration process.
- Follow Setup Wizard: Follow the on-screen instructions provided by the Setup Wizard. This may include selecting your internet connection type and entering the necessary ISP settings if applicable.
- Complete Configuration: Once you’ve entered all required information, proceed through the Setup Wizard to complete the configuration process. The router will automatically apply the settings and reboot if necessary.
Step 4: Final Checks
- Test Connectivity: After the router has rebooted, disconnect the Ethernet cable from your computer and connect it to one of the LAN ports on the router. Ensure that your computer is able to connect to the internet through the newly configured router.
- Adjust Additional Settings: Depending on your specific network requirements, you may need to adjust additional settings such as wireless network configurations, firewall settings, or port forwarding rules.
By following this step-by-step tutorial, you can easily configure a new D-Link router to work within your existing network environment. By paying close attention to details and following the provided instructions diligently, you can ensure reliable connectivity and smooth integration with your ISP settings. Whether you’re setting up a home network or optimizing your office infrastructure, this guide ensures a hassle-free setup process for your D-Link router.
